
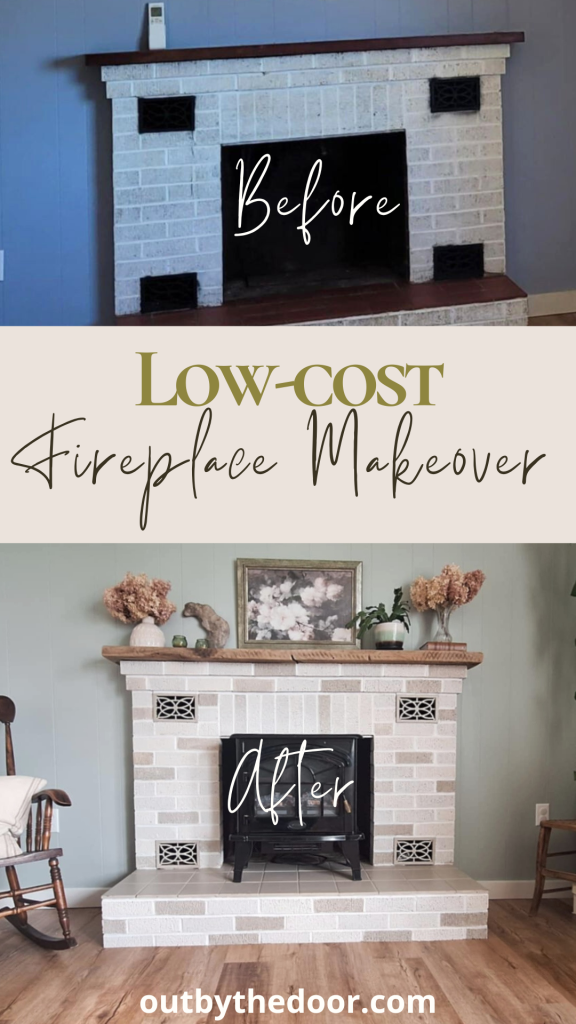
Come and see the before and after of our low-cost old fireplace makeover and how I painted the old, outdated brick and red ceramic tile for a faux stone look.
Disclosure: as an Amazon Associate, I earn a small commission from qualifying purchases at no extra cost to you. Read my full Disclosure and Policy here.
Transforming an Outdated Fireplace.. For Free
When we bought our home just over a year ago, I was so excited to have a fireplace! There’s something so cozy about fireplaces. They are often the heart of a home, where people gather for warmth, stories, and quiet evenings. Not to mention, all the fun you can have styling a fireplace mantle, especially during the holiday season!
But what happens when that cozy centerpiece feels… a little outdated? That’s exactly how I felt looking at our old red brick fireplace. It was dark, dated, and didn’t match the natural, calming feel I wanted in our living space.
I spent a few months imagining how to give this old and tired fireplace a new look. At first, I thought about adding a wooden mantle surround to cover at least some of the brick, then maybe installing built-ins or new tiles. But those projects were all complicated and costly. What I really wanted was a stone fireplace, full of the charm you find in vintage homes. That thought actually sparked the idea!
Instead of spending thousands on a full stone refacing, I took a different approach: a simple, budget-friendly transformation using just paint and a little creativity.
At first, I wasn’t sure how it would turn out. But since this project didn’t cost me anything (I already had all the materials), I decided to give it a try. I’m actually in love with the way it turned out! With a few hours of work and some creative layering, I turned our dated brick into a soft, natural-looking faux stone fireplace that completely changed the room.
Our old ugly fireplace: the Before
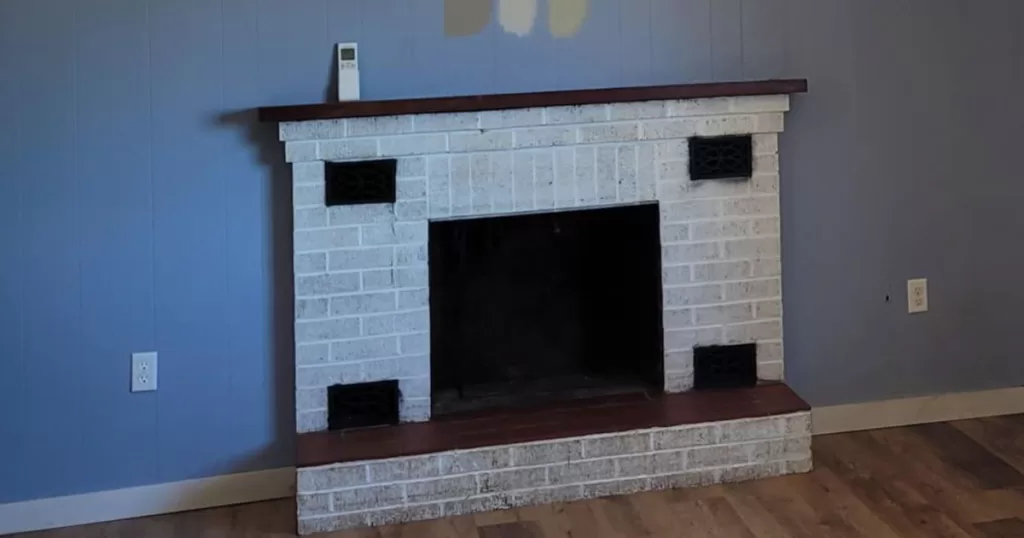
This fireplace was honestly one of the ugliest I’d ever seen (lol)! The original red brick had been (poorly) painted with a cold white paint that was now dingy and dirty. The red ceramic tiles and reddish wooden mantle clashed with the floor and blue wall, and those black iron vents were just a punch in the eye.
Why I love this Project
I absolutely love natural stone, and I would love to have a real stone fireplace in my home someday. Stone has such a timeless, organic beauty and adds natural elegance to any space, especially in a cozy, cottage-inspired home. But real stone just wasn’t in the budget.
Painting your brick to look like stone is extremely affordable, easy, and totally customizable to suit your home. And best of all? It’s reversible! Paint can completely transform the look and feel of anything, including an old fireplace. Until I can afford real stone, this was the perfect way to give our fireplace the new look it deserved.
Speaking of paint, take a look at how I transformed this outdated house into a cozy cottage with my curated Benjamin Moore whole house paint palette!
Let me show you step-by-step how I did it.
1. Painting the Fireplace Brick for a Faux Stone Look
Step 1: Cleaning
The first step was cleaning the fireplace from head to toe. I used a vacuum with a small brush attachment to remove any dust and dirt from the fireplace surface, then wiped it down with a wet cloth.
Step 2: Priming
Next, I applied a universal primer over the brick, focusing especially on the areas where the existing paint was chipped and dirty.
Step 3: Choosing the paint colors
Then I picked out the paint colors for the faux stone look. I used small Benjamin Moore samples I already had on hand, so this part didn’t cost me a thing! The colors I used are:
- Simply white: a slightly warm white I used on the mortar joints in between bricks
- Maritime White: a light beige with warm tones
- Pale Oak: a light warm gray
- Pashmina: a darker greige
Step 4: Painting the bricks
Now for the fun part!
I painted the bricks using a paint brush, alternating the three different colors in a balanced way to mimic natural stone. I only gave one coat, then touched up small imperfections. Since we’re going for a stone look, it doesn’t have to be perfect!

Once the bricks were dry, I used a small brush to paint the mortar joints with Simply White.
Step 5: Touching up
After everything dried, I used a small brush for any final touch-ups where needed.
2. Painting the Red Ceramic Tile and Vents
I painted both the red ceramic tile and the iron vents using Benjamin Moore Pashmina, the darkest brick color. It mimics the look of stone beautifully and has a balanced tone—not too warm or cool, not too light or dark.
To paint the tiles:
- I cleaned them thoroughly with dish soap and water, then rinsed well.
- Once dry, I applied two coats of primer over the tiles and grout.
- After the primer dried, I painted them using a small roller and my sample paint.
Even though the samples aren’t meant for tile, the paint has held up surprisingly well after a few months. But for a longer-lasting finish, I recommend using an actual tile paint like this one. I let the first coat dry overnight, then applied a second.
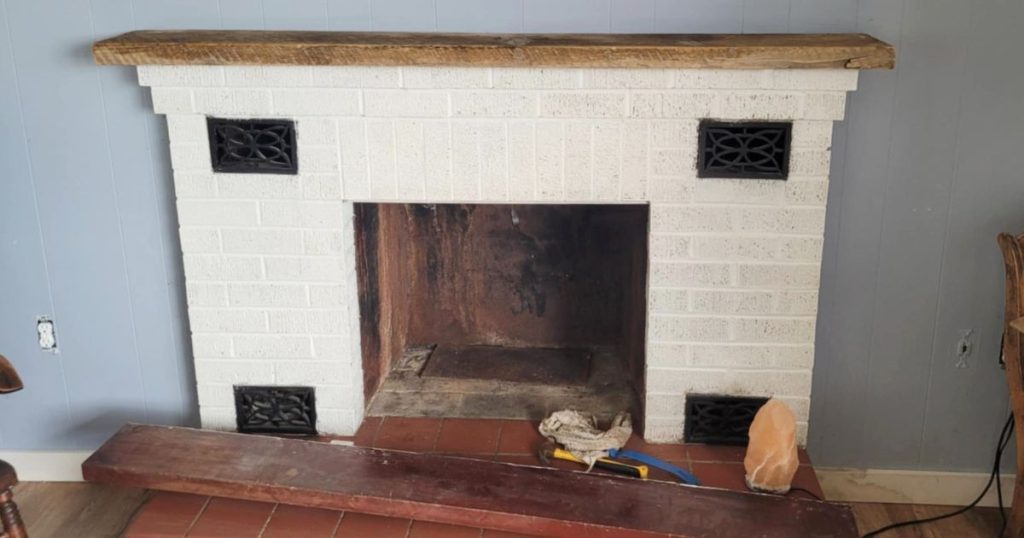
3. Replacing the Old Wooden mantle
Finally, I got rid of the old red wooden mantle. Truth to be told I couldn’t even wait to be done painting to try the new mantle on!
For a rustic cottage look, I wanted a piece of wood that felt “lived-in.” An old barn beam would’ve been perfect, but instead, I found a large piece of weathered lumber in our backyard. I cut it to size and installed it, and I think it looks amazing! I love that this part of the project was totally free too.
If you want to create your own distressed mantle, find a thick board (about 3″ thick by 8″ wide), rough it up using tools for a weathered look, and finish it with a wood stain of your choice.
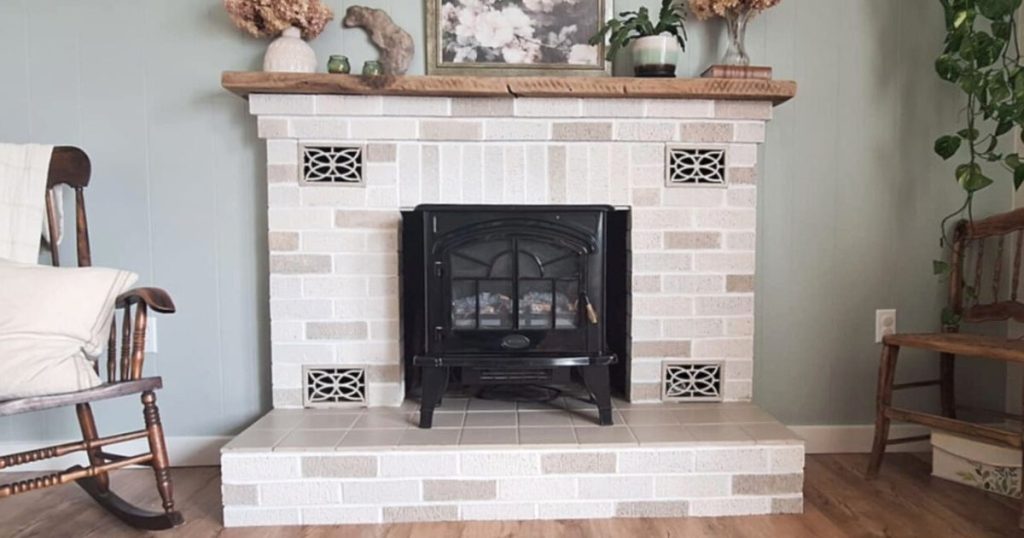
Low-cost DIY Fireplace Makeover: the after
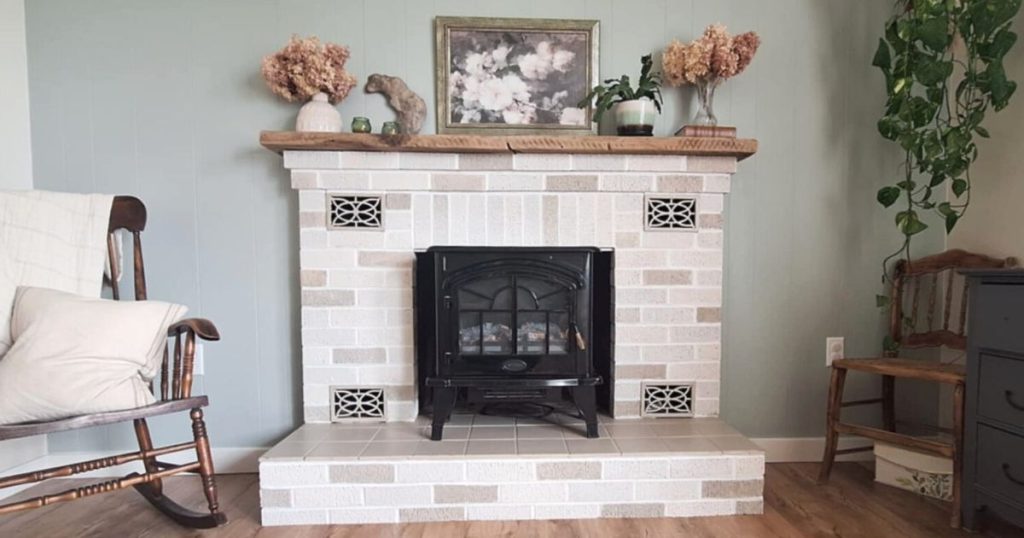
And here’s the big reveal!
With a fresh coat of paint and a new mantle, this fireplace is completely transformed. I love how the warm neutrals play together and pair perfectly with the old (new) mantle. The faux stone effect complements our oak floors and cozy cottage color palette, especially with the updated fireplace wall color (BM Tranquillity). You can see all the paint colors I used in my house in this post.
I also recently found an electric fireplace on Facebook Marketplace, and I think it completes the whole look beautifully. I’m already looking forward to cozy winter nights!
If you liked this DIY, if you did something similar, or want to try painting you old fireplace this way, I’d love to hear your experience! Drop me a comment down below.
More posts from a homemade life
Cozy Cottage Whole House Paint Palette (by Benjamin Moore)
Small Cottage Kitchen Makeover on a Budget
What is Simple Living? (And 10 Tips to Simplify your Life)
Cute and Cozy Minimalist Kid’s Bedroom on a Budget
How to Measure Screw Length Hack
How to Start a Vegetable Garden on a Budget
How to Make Bone Meal Fertilizer with Bones
Shop my Amazon Favorites
Shop all my Amazon favorite products for the kitchen, home, garden, decor, and more here!
Pin it for later


Wow, that turned out so beautiful! What an amazing transformation with just some paint. That was a genius idea and for an unbeatable price! Awesome job, I love it!😍